Here are some very detailed instructions for installation of your new Bloggy Blog Designz Button. Go in to your dashboard
Click on Layout
Click on Add a Gadget
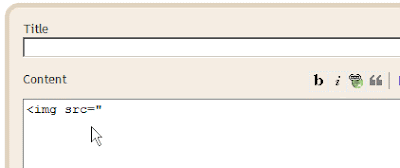
A gadget window will open up and you will see this,
Now you will need to add in some text to call the button
Type < img src=" With no space between the < and the img
Next add the link that was given to you at checkout.
Then add a " and a > at the end! With no spaces of course so it looks like the picture above. If you want your Button to say anything above it then you can add something in the title box, otherwise... leave it blank ;)
Now, click save!
Thank you so much for choosing Bloggy Blog Designz,we hope you love your new design as much as we loved making it!
If you have any questions on installation please feel free to contact us, and we will get right back to you.


0 comments:
Post a Comment